Use timelines to organize and store your research in chronological order.
Create a new timeline
Select ‘Timelines’ from the drop-down list via the ‘My Account’ button.

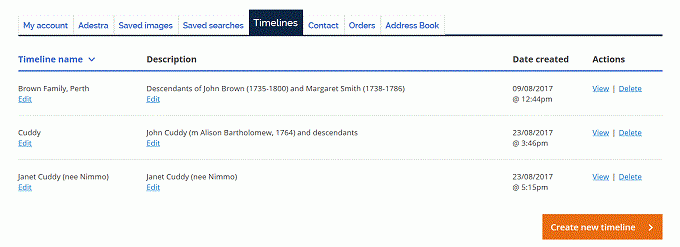
Click ‘Create new timeline’.

Enter a meaningful ‘Timeline Title’ and a ‘Timeline Description’. Click ‘Save’.

Add records to a timeline
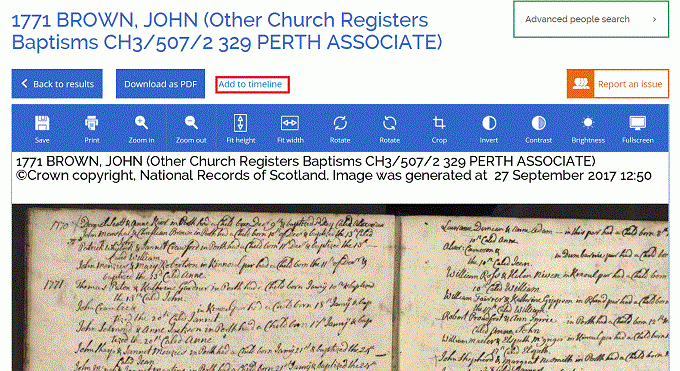
Attach records by selecting ‘Add to timeline’ from the Image Viewer. (You can access the Image Viewer via a records search or via the ‘Saved images’ button).

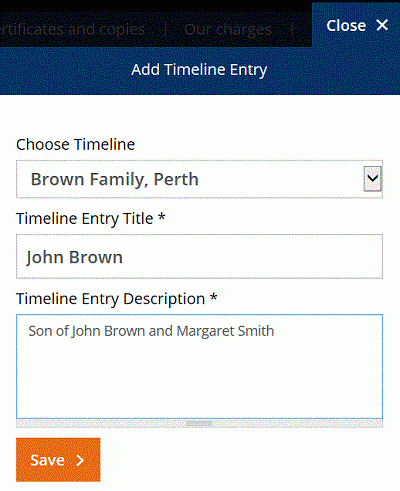
Specify the relevant timeline from the ‘Choose Timeline’ drop-down. Provide a meaningful ‘Timeline entry title’ and a ‘Timeline entry description’. Click ‘Save’.

The error message ‘Record already added to your timeline’ appears when an image is already available on a timeline. Go to your timeline to view the entry.
View, edit and sort timelines
Navigate to the timelines area via the ‘My Account’ button. Use the column headings to sort by ‘Timeline name’, ‘Description’ or ‘Date created’. Select ‘Edit’ to amend a ‘Timeline name’ or ‘Description’ at any time. Select ‘View’ to open the Timeline Viewer.

Timeline Viewer
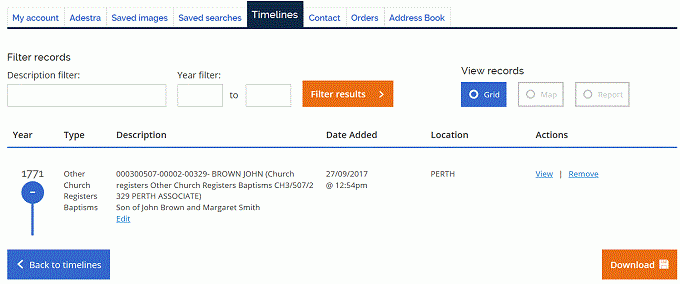
There are three ‘View records’ options: Grid, Map and Report. Grid is the default view. It includes a ‘Filter records’ function to search for records within a timeline. The ‘Download’ button exports timeline results to a CSV file.
The timeline displays records in chronological order. Select ‘Edit’ to amend a Description at any time. Select ‘View’ to open the Image Viewer. Select ‘Remove’ to delete a record entry from the timeline.

Delete a timeline
Navigate to the timelines area via the ‘My Account’ button. Select 'Delete' to remove a timeline permanently. Once deleted, a timeline is unrecoverable. Click ‘Confirm’ to proceed with deletion, otherwise click ‘Cancel’.

